DotNetNuke Module Development 101: 4 - Hello World 2 - Using WebMatrix to Create a Module
In part 3 of this series on DotNetNuke Module Development we created our first module “Hello World”. In this blog I will describe a second way that you can create modules.
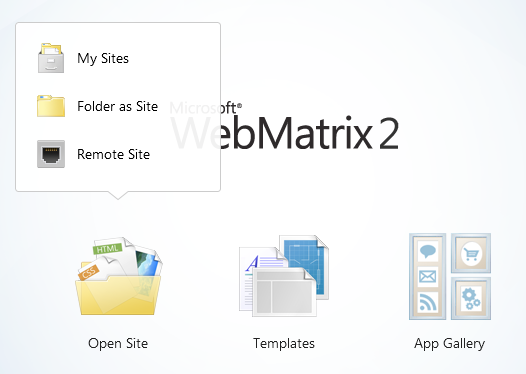
The next method we will use is to create the same User Control (ascx file) in a simple IDE like WebMatrix. WebMatrix is a free download from Microsoft, so is an excellent choice for novice or hobby developers who are just starting out on DotNetNuke development. When you launch WebMatrix you will be presented with a “QuickStart” dialog, if you Select “Open Site” and “Folder As Site” you can browse to your website and open it in WebMatrix.
Figure 1: Open an existing site in WebMatrix |
 |
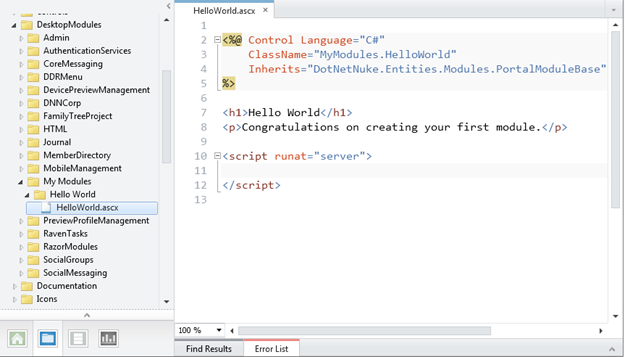
Note that WebMatrix also allows you to open a remote site, so you can use WebMatrix to make minor changes to live Production sites. In Figure 2 I show the “Files” view in WebMatrix with the HelloWorld.ascx file we created in the last post opened in the editor.
Figure 2: WebMatrix in File Mode |
 |
 Lets re-create the Hello World module using WebMatrix.
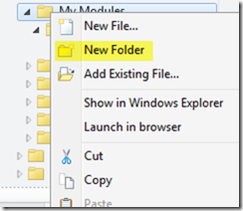
- We first right click on the My Modules folder - our Owner folder as described in the previous post
- Select the New Folder option to create a new Folder.
- Click on the new folder to rename it Hello World 2.
- Right-click on this new folder and select the New File option.
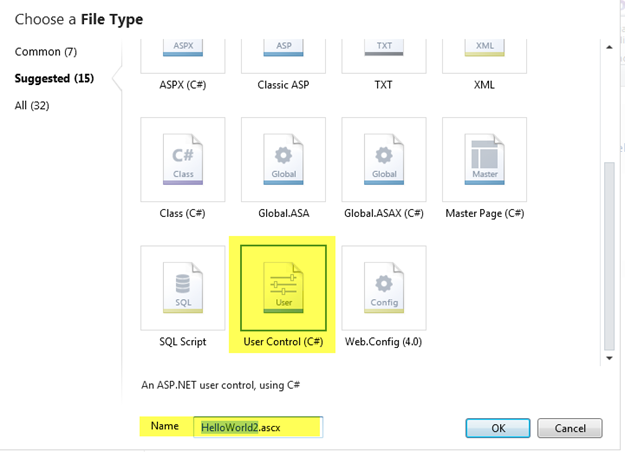
- Select the User Control option from the list of file types
- Give it the name HelloWorld2.ascx and select Ok (see Figure 3)
Figure 3: Create a new UserControl in WebMatrix |
 |
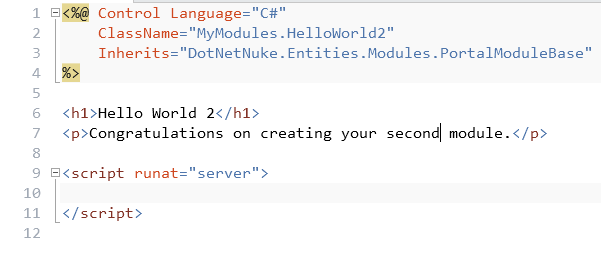
Just as in the previous post we need to edit the resulting HTML in order to render what we want. In this case we will enter the text shown in Figure 4. If you compare this with Figure 2 we have modified the code a little. The class name has been changed to HelloWorld2 and the h1 tag text has been changed to “Hello World 2”
Figure 4: The Hello World 2 User Control |
 |
We have now created a “copy” of the previous module with slightly different text, using our external IDE - WebMatrix. We could, of course have used a number of different IDE's to do this - some commercial, some free, or we could have used Notepad. Now that we have created the User Control that implements IModuleControl, we need to add it to DotNetNuke, so that it is aware of its existence.
As in the previous post, to do this we need to be on the Host > Extensions page, and again we need to select the “Create New Module” option. This time however, we select the “Control” option in the first dialog see Figure 5.
Figure 5: Creating the module from a Control |
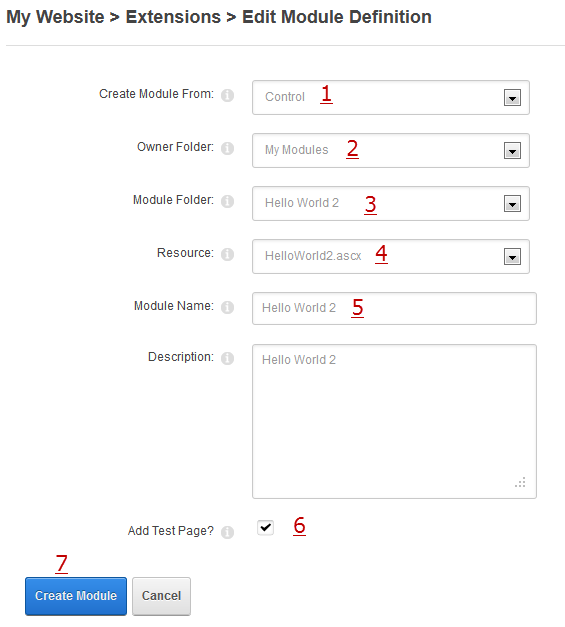 |
In this case rather than creating a new Control we are create a module from an existing Control.
You will need to provide values for most of the fields as described below:
- Select “Control” to create a module from an existing Control.
- Select the “Owner” folder where the module is located in this case My Modules.
- Select the “Module” folder where the module is located - in this case Hello World 2.
- Select from the list of controls in this folder - in this case there is just one - HelloWorld2.ascx.
- Next you can provide a more friendly name for the module. This will be the name used to identify it in the application itself. You can also provide an optional description to describe what your module does.
- Finally you can check this box to automatically create a “Test Page” to host the module.
- When you are happy with the options you can click the Create Module button.
As before when we click the Create Module button we will be redirected to a new Test Page containing the module we just created.
Figure 6: The new Module deployed on a page |
 |
So now we have two ways to create simple modules that do not require a sophisticated IDE. In the next post in this series I will show how we can do the same thing in Visual Studio and we will see how we can add “code” to the modules.
