DotNetNuke Module Development 101: 3 - Hello World - Our First Module
 Back in April I started a series of blog posts on DotNetNuke Module Development. So far we haven’t actually done any development, so in this blog post we will create our first module, and in the long-held tradition of software development - lets call it Hello World.
In part 2 of this series I mentioned that the only thing required by a module was that it needed to implement the IModuleControl interface. You could do this by explicitly implementing the interface or you can inherit from one of the three base classes.
- PortalModuleBase – this base class is the original base class for module development and it inherits from the ASP.NET UserControl class. In addition to implementing IModuleControl it also provides a number of other helper methods and properties
- ModuleUserControlBase – this base class is a simple implementation of IModuleControl which also inherits from the ASP.NET UserControl.
- ModuleControlBase – this base class inherits from the WebControl base class (rather than UserControl). To use this base class the module control would be compiled as part of a class library.
Using DotNetNuke itself to create the module
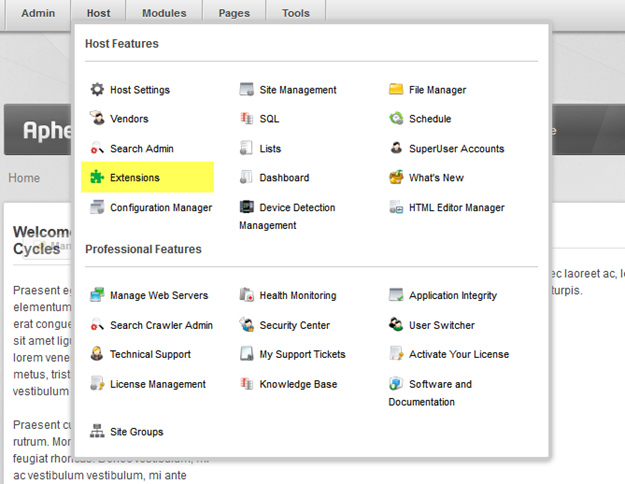
If you are developing a really simple module, then you don’t need to use a fancy programmer’s IDE (Integrated Development Environment) like Visual Studio. You can just use the application itself. DotNetNuke provides some rudimentary tools to help you create your own module. These tools can be found under the Host > Extensions menu - Figure 1.
Figure 1 : Select the Host > Extensions page from the Control Panel |
 |
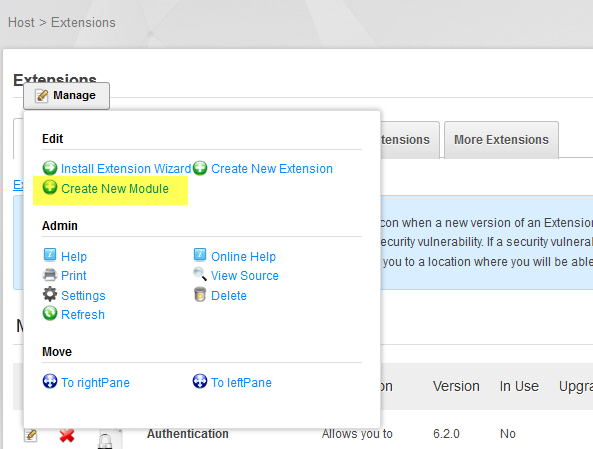
After selecting the Host > Extensions page there is a Module Action to create a new module. In DNN 6 and later you can access the module action menu through the Manage “button” - Figure 2.
Figure 2: Select the Module Action - Create New Module |
 |
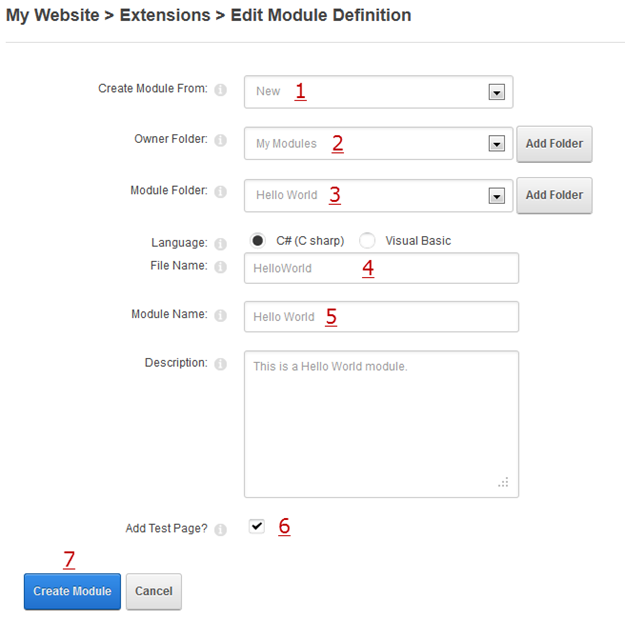
When you click Create New Module you will be presented with a form to use to create your module. The first choice you need to make is how you want to “create” your module. We will choose the 1st option “New” - once this option is selected a number of other fields will be displayed - as seen in Figure 3.
Figure 3: Fill out the Create New Module Form |
You will need to provide values for most of the fields as described below:
- This drop-down allows you to select how to create your new module. In this case we have chosen “New”.
- All modules are created in the DesktopModules folder of your website, so to provide protection from conflict, DotNetNuke provides two levels of folders where you can create your modules. The first level is the “Owner” folder - commercial developers use this level for their Company Name. If the folder you want does not already exist you can click on the Add Folder button to create a new Owner Folder.
- The second level is for the name of your module. In this case I have selected Hello World. Again, if the folder you want does not already exist you can click on the Add Folder button to create a new Module Folder.
- You next need to provide a name for the Module Control, and select a programming language - IN this case I have named the control HelloWorld and selected C# as the programming language.
- Next you can provide a more friendly name for the module. This will be the name used to identify it in the application itself. You can also provide an optional description to describe what your module does.
- Finally you can check this box to automatically create a “Test Page” to host the module.
- When you are happy with the options you can click the Create Module button.
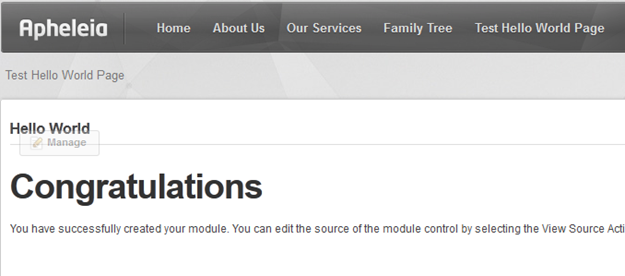
If you checked the “Add Test Page” checkbox in (6) above then you will be redirected to the test page with your module added already.
Figure 4: The new Module deployed on a page |
 |
An that’s it - you have created your first module. Except its not actually a Hello World module yet. We need to “edit” the module control to render the content that we want.
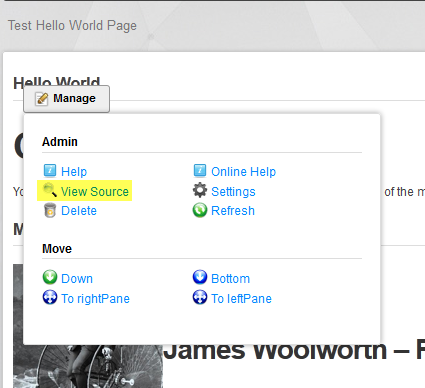
Keeping with our decision to use DotNetNuke’s built in tools to create the module we can edit the Module Control’s source using the Module Action “View Source” - Figure 5
Figure 5: Select the Module Action - View Source |
 |
The drop-down displays all the editable files that exist in the Module Folder. In this case we just have one, so we will select that option to view the rest of the form - see Figure 6.
Figure 6: Editing the View Source Form |
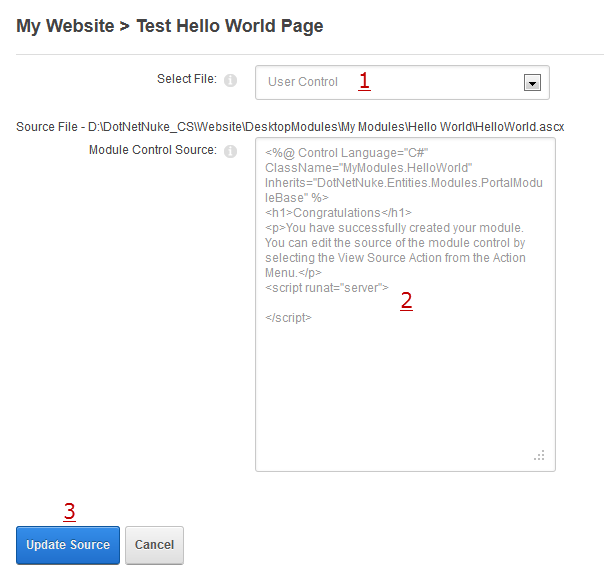 |
- as mentioned above the drop-down allows you to choose from the files that can be edited - In this case just one - the User Control.
- This text area displays the actual html that is in the file. You can edit this text to modify your module. The first few lines between the <% and %> sections should not be changed. They are required by ASP.NET and identify the new of the “class” and the base class that the UserControl inherits from - in this case PortalModuleBase.
- When you are happy with your changes you can click the “Update Source” button to save the changes.
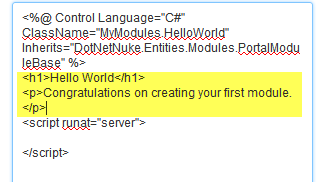
I modified the code in the text area as follows:
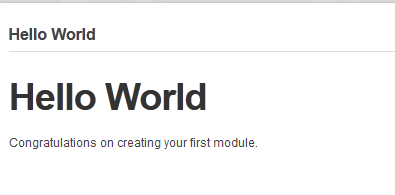
and after clicking the “Update Source” Button my Hello World module looks like.
This quick and dirty way of creating a DotNetNuke Module is quite useful if you have a simple piece of custom HTML or JavaScript that you want to add to your site. In the next blog, I will show how you can create the same module in different ways

