Into the Matrix with Neo4j: 2 - Creating an Azure VM
 A couple of months ago I blogged about Neo4j, a graph database that I plan to check out. I didn’t get much chance to play with it, and a couple of weeks ago I found myself having to re-install Windows on both my desktop computer and my Surface Pro.
As an ASP.NET MVP I get 160 credits per month of Azure services, enough to run 2-3 small VMs, so I thought it would make sense to install Neo4j on an Azure VM so it would be accessible whichever computer I was working at.
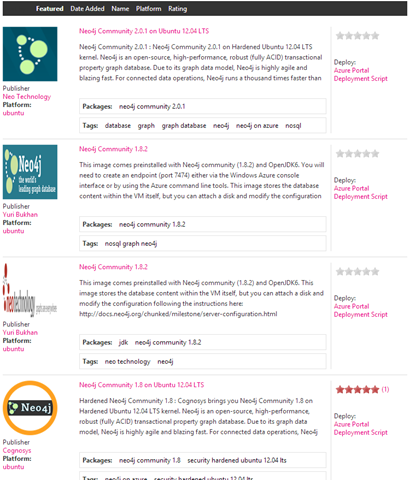
Now Azure has a gallery of existing VM images so I checked there first and there is nothing there. That wasn’t surprising – most of the images in the gallery focus on Microsoft applications. Microsoft Open Technologies however host a gallery of community created VM images called VM Depot. So my next stop was to check there. There are four different configurations of Neo4j in VMDepot.
Figure 1: Neo4j VM images available at VM Depot
However, none of them were quite what I was looking for. 3 are Ubuntu images with different versions of Neo4j (1.8, 1.8.2 and 2.01) and the other one is a Windows image with Neo4j v1.8.2
I was looking for a minimum of version 2 running on Windows.
So the next step was to build my own Azure VM. Its actually quite simple – there are a couple of small gotchas, but hopefully you should be able to create your own Neo4j server by following these simple steps.
Create the Windows Server VM
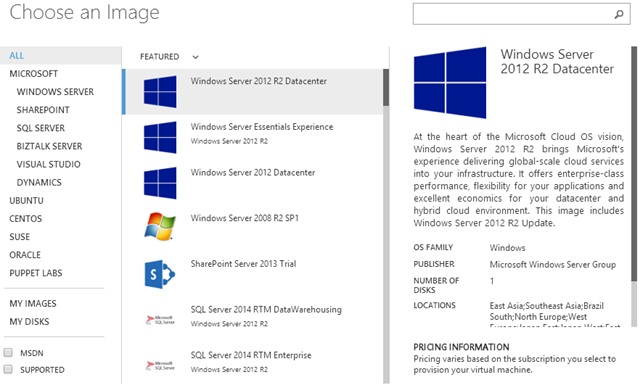
The first step is to create a simple Windows Server VM. I used the new “From Gallery” option and selected the Windows Server R2 Datacenter template.
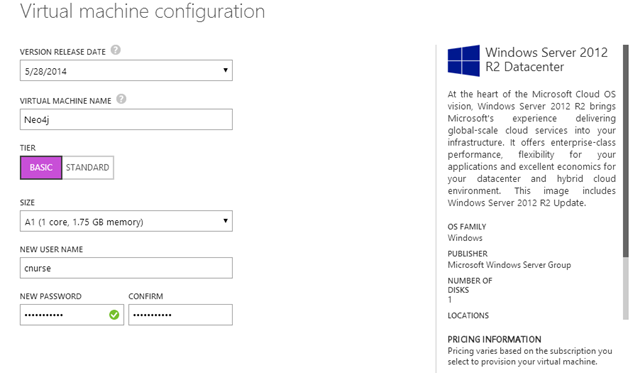
Next I configured the VM as shown below, giving the Virtual Machine an easy to remember machine name – Neo4j. I selected the Basic tier as I am just using it for evaluation and 1 core as I don’t propose to push the system too hard. Finally I entered a username and password – you will use this as your credentials to access the site through Remote Desktop.
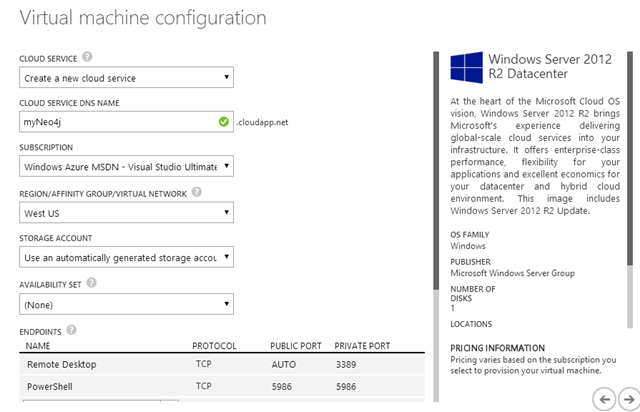
In the third step I had to select the cloud service I wanted to use – in this example I used myNeo4j, which gave me a url to access my VM – myNeo4j.cloudapp.net. I next selected my MSDN subscription and chose a location for the VM – West US – near to where I live so I don’t get too much network latency. Finally every VM needs a Storage Account (Blob storage) where the virtual disk used for the VM is stored. You can choose an existing one or use an automatically generated one.
The last page of the Wizard can be left at the default settings, and clicking the final “tick” button will create your new VM and cloud service. It will take about 5-10 minutes for the VM to be created and to be started.
Accessing your Azure VM
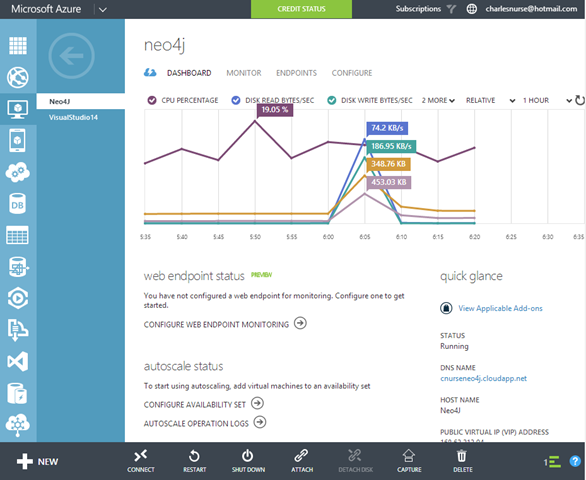
Once your VM is up and running you can view its dashboard in the Azure portal.
At the bottom of the page you can click on the “Connect” button to create an rdp file which will be downloaded to your computer. Double-click on this file to launch your RDP client – enter the credentials you used on the second screen of the Wizard and you should see the desktop of your Windows Server 2012 VM (something like the image below)
Installing Neo4j on your Azure VM
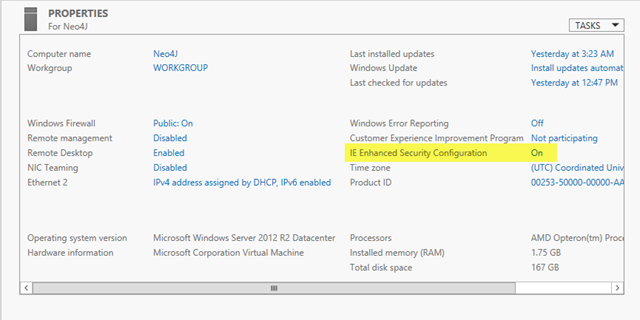
In order to install Neo4j we need to download the Community edition to our VM. Our VM is on the internet but, by default, Internet Explorer is locked down. To allow Internet Explorer to browse the internet and download a file we need to open the security. To do that we launch Server Manager – the icon immediately to the right of the Windows Start icon.
Click on the highlighted “IE Enhanced Security Configuration” option and you will get a dialog where you can disable this enhanced security. Switch of enhanced security for Users and Administrators.
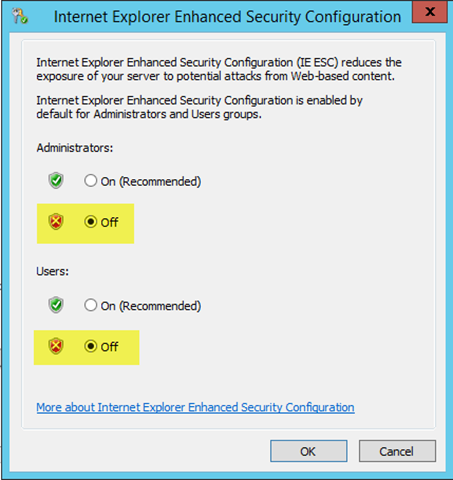
Click Ok and you will now be able to browse and download using Internet Explorer.
Browse to Neo4j’s Windows downoad site, download Neo4j and install it just as you would on your desktop machine. You can then launch Neo4j with the launcher – as I showed in the earlier blog.
Accessing Your Neo4j Server
If all you want to do is run Neo4j and use the browser on the VM that you have just created through RDP then your task is done.
However, if like me you were looking to use your new VM as a Neo4j server on the Internet then there is still a little configuration that needs to be done.
Creating an Endpoint in Azure
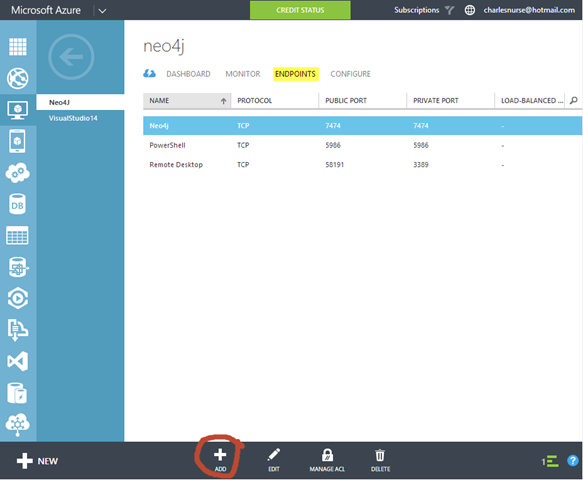
The first step is to create an endpoint on Azure so that Azure can map the incoming request. On the Endpoints tab for the Virtual Machine select the “Add” button
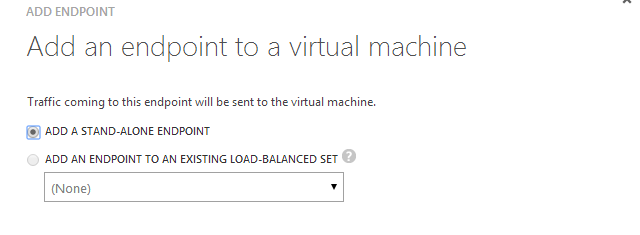
You will then be able to create an endpoint for your Neo4j server.
Select “Add a Stand alone” Endpoint and click the next button.
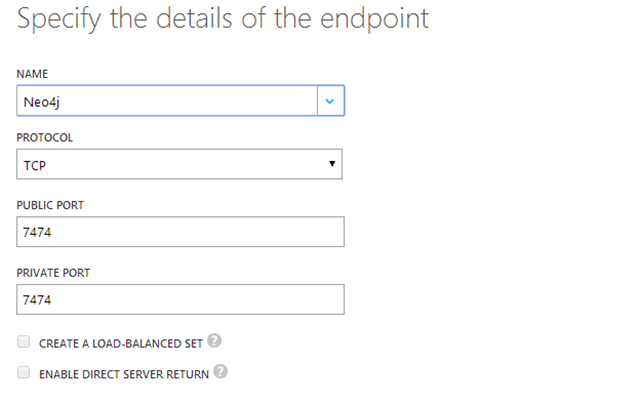
Enter a name for the endpoint, select TCP as the protocol and then specify a public (external) and private (internal) port. The private port is 7474 by default, so you might as well use that for both entries.
Opening the Firewall
We next have to open the Firewall on the VM for the Neo4j port (7474). To do this you need to find the “Windows Firewall with Advanced Security” applet which you can find in the Administrative Tools, in the Control Panel.
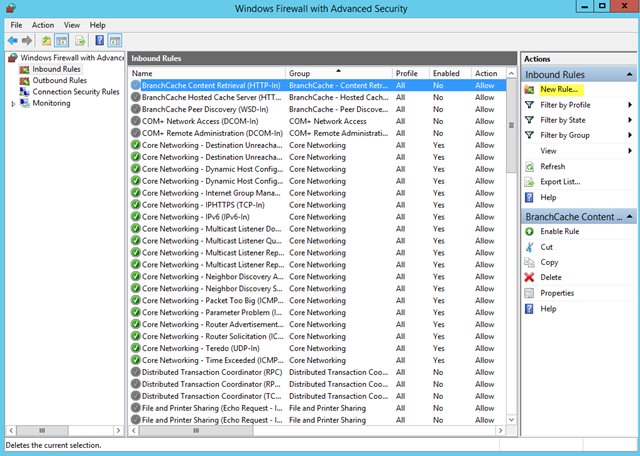
Select Inbound Rules in the left pane and locate the “New Rule” command in the top right. This launches the New Inbound Rule Wizard.
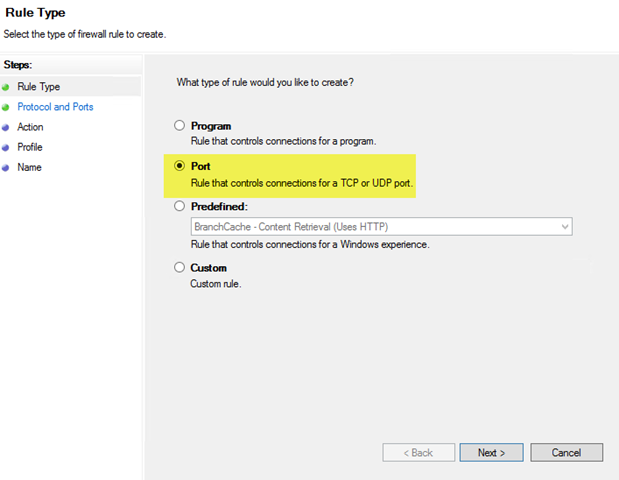
Select Port on the first screen and click Next
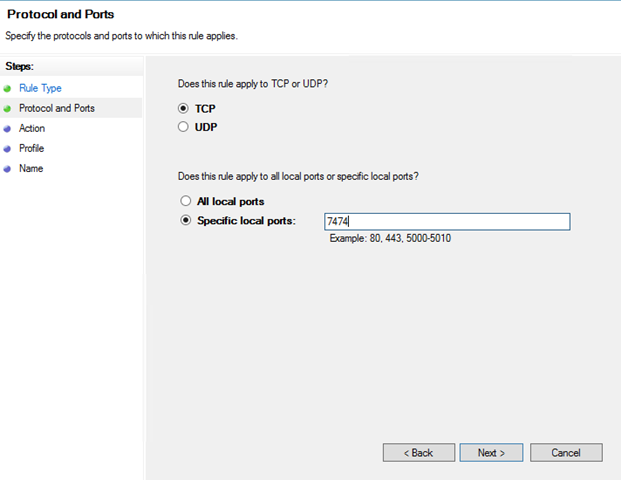
Select specific local ports, enter 7474 in the box and click Next
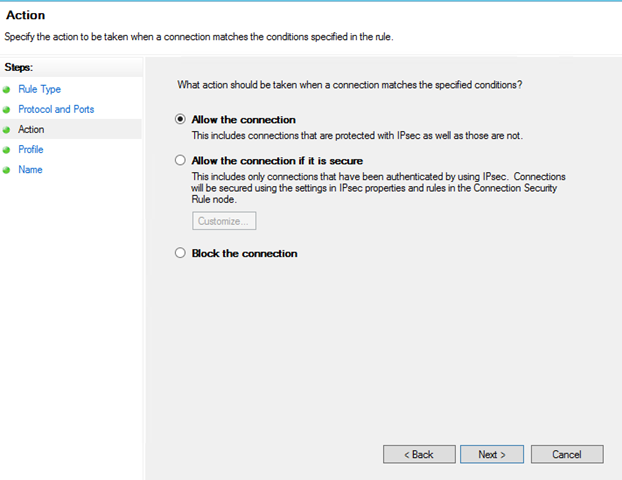
Select “Allow the Connection” and click Next
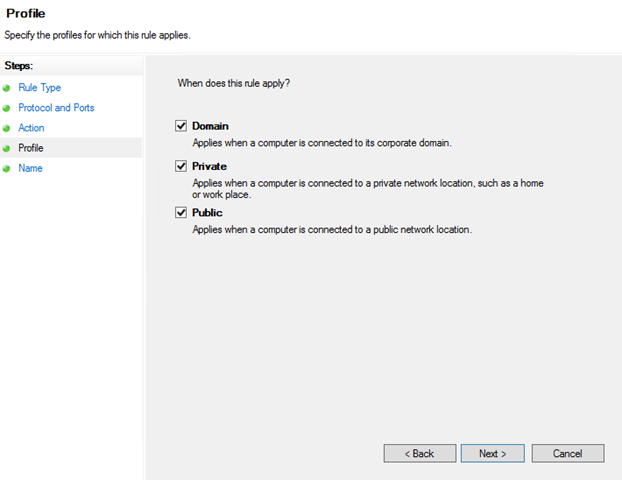
Accept the default Profile and click Next
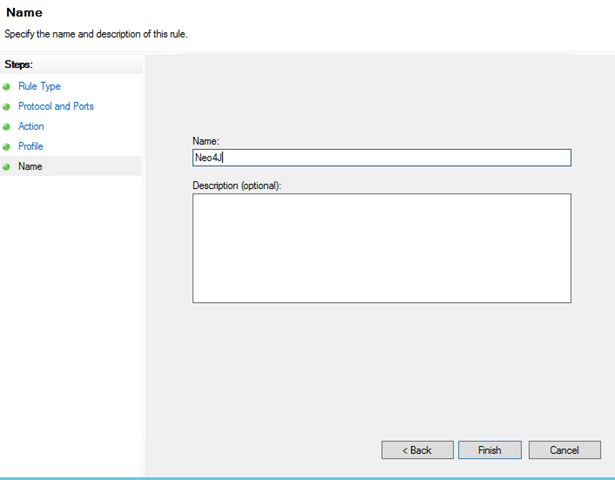
Finally give it a name and click Finish. You have now opened the Firewall for traffic to the Neo4j default port.
Configure Neo4j
The last step is to configure Neo4j to accept connections from external machines. By default Neo4j is configured to only accept requests from localhost.
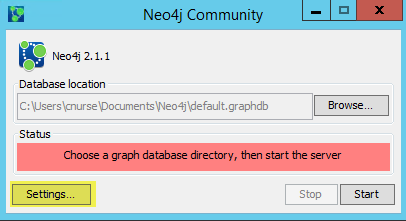
To modify Neo4J settings Neo4J must be stopped. Then you can click on the Settings button.
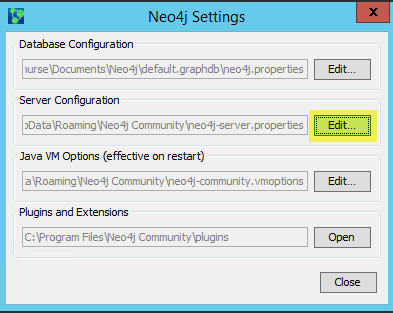
Then click on the Edit button for the Server Configuration
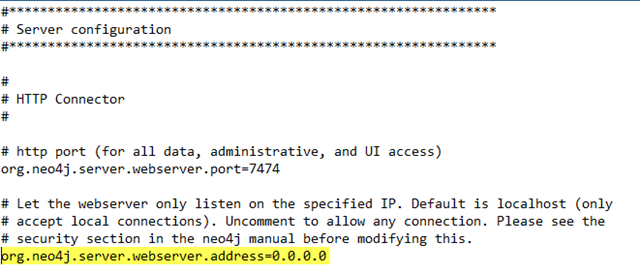
And un-comment the line highlighted (remove the #).
Once you have done that you should be able to browse to your new Neo4j server from any computer using the url for the cloud service you used above and port 7474, e.g. myneo4j.cloudapp.net:7474.
That's it. In future blogs I will be using this Neo4j server instance to explore Neo4j features.
Stay tuned!!

